Creating a QR Scanner app in Flutter involves several steps, including setting up your development environment, creating a new Flutter project, adding dependencies, writing the code, and testing the app. Below is a step-by-step guide to help you build a simple QR Scanner app.
Step 1: Set Up Your Development Environment
- Install Flutter: Follow the Flutter installation guide to set up Flutter on your machine.
- Set Up an Editor: Install Visual Studio Code, Android Studio, or any other preferred IDE. Install Flutter and Dart plugins for your editor.
Step 2: Create a New Flutter Project
- Open your terminal or command prompt.
- Run the following command to create a new Flutter project:
flutter create qr_scanner- Navigate to the project directory:
cd qr_scannerStep 3: Add Dependencies
- Open the
pubspec.yamlfile in the root of your project. - Add the
qr_code_scannerpackage to thedependenciessection:
   dependencies:
     flutter:
       sdk: flutter
qr_code_scanner: ^1.0.0- Save the file and run the following command to install the package:
flutter pub getStep 4: Create the User Interface
- Open the
lib/main.dartfile. - Replace its contents with the following code to create the basic structure of the app:
   import 'package:flutter/material.dart';
   import 'package:qr_code_scanner/qr_code_scanner.dart';

   void main() => runApp(MyApp());

   class MyApp extends StatelessWidget {
     @override
     Widget build(BuildContext context) {
       return MaterialApp(
         title: 'QR Scanner',
         theme: ThemeData(
           primarySwatch: Colors.blue,
         ),
         home: QRViewExample(),
       );
     }
   }

   class QRViewExample extends StatefulWidget {
     @override
     _QRViewExampleState createState() => _QRViewExampleState();
   }

   class _QRViewExampleState extends State<QRViewExample> {
     final GlobalKey qrKey = GlobalKey(debugLabel: 'QR');
     Barcode? result;
     QRViewController? controller;

     @override
     Widget build(BuildContext context) {
       return Scaffold(
         appBar: AppBar(
           title: Text('QR Scanner'),
         ),
         body: Column(
           children: <Widget>[
             Expanded(
               flex: 5,
               child: QRView(
                 key: qrKey,
                 onQRViewCreated: _onQRViewCreated,
               ),
             ),
             Expanded(
               flex: 1,
               child: Center(
                 child: (result != null)
                     ? Text('Barcode Type: ${result!.format}   Data: ${result!.code}')
                     : Text('Scan a code'),
               ),
             )
           ],
         ),
       );
     }

     void _onQRViewCreated(QRViewController controller) {
       setState(() {
         this.controller = controller;
       });
       controller.scannedDataStream.listen((scanData) {
         setState(() {
           result = scanData;
         });
       });
     }

     @override
     void dispose() {
       controller?.dispose();
       super.dispose();
     }
   }
Step 5: Run the App
- Ensure that your device or emulator is running.
- Run the following command to start the app:
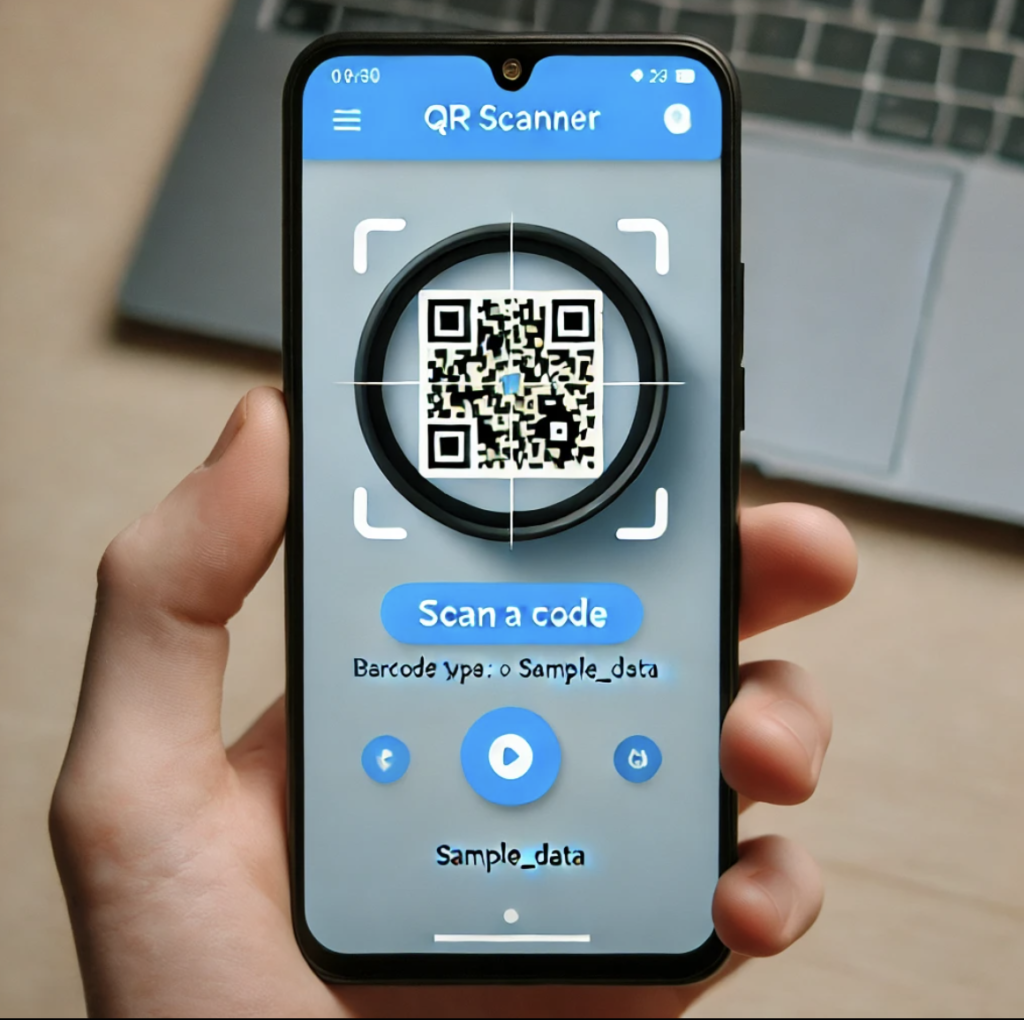
flutter run- The app should open with a camera view to scan QR codes. Once a QR code is detected, the app will display the type of barcode and the data contained in it.
Step 6: Testing the App
- Test the app by scanning various QR codes.
- Ensure that the app correctly displays the scanned data.
Step 7: (Optional) Customize the App
- Customize the UI by modifying the widgets in the
QRViewExampleclass. - Handle different QR code formats and add features like storing scan history, sharing scanned data, or triggering actions based on the QR code content.
OUTPUT
Source Code
You can copy the code provided above directly into your Flutter project to create a basic QR Scanner app.
If you have any issues or need further customization, feel free to ask!
Related Articles:
- Creating a Ludo app in Flutter with Source Code Step by step
- How to make Ludo app in Flutter with Source Code Step by step
- How to make PDF Reader app in Flutter with Source Code Step by step
- How to Make a ToDo App with Flutter with source Code StepWise in 2024
- What is package in Flutter (Dart) with example in 2024
- What is class in Flutter(Dart) with example step by step
- Advantage of Flutter with examples in 2024
- Top 15 Amazing Applications Built with Flutter Framework
- Specialized PDF reader designed specifically for music sheets
- Flutter File Integrity Checker app for checking integrity of a file
- Christmas Quote Generator app built with flutter source code
- Create fast food orders and bundle it up into a QR code with flutter